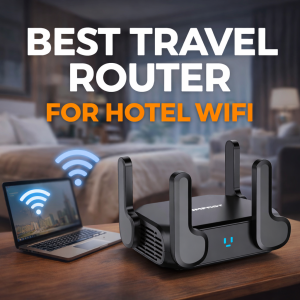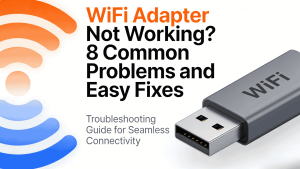


WiFi Adapter Not Working?

If your WiFi adapter suddenly stops working, you are not alone. Sometimes it shows a yellow exclamation mark in Device Manager. Sometimes the connection drops during calls or downloads. In other cases, Windows simply cannot find any network.
For individual users it is annoying. For resellers, IT service teams, or OEM brands, it usually turns into support tickets, product returns, or complaints from customers who believe the adapter itself is unreliable.
This guide walks through eight common reasons a WiFi adapter stops working. The fixes start with simple checks like USB ports and system restarts, then move to driver issues and Windows updates. You will also see a quick hotspot test that helps confirm whether the issue is coming from the adapter, the computer, or the network environment.
1. WiFi Adapter Not Working. Start With These Quick Checks
Most “WiFi adapter not working” moments are not complicated—they’re usually a loose connection, a picky USB port, or a stuck system state.
Start here first, especially if you’re using a COMFAST USB adapter and just want the fastest path back online.
Do these quick checks in order (2 minutes):
- Reseat the adapter (unplug → plug in firmly)
- Switch USB port (prefer USB 3.0, skip hubs)
- Restart the PC (then router/extender if needed)
- Test with a phone hotspot to isolate the real problem

1.1. Is Your Adapter Plugged In Right?
This sounds basic, but it’s the #1 silent failure: a slightly loose USB connection can make the adapter “disappear.”
Quick check:
- Unplug the adapter completely
- Plug it back in firmly (no wobble)
- If there’s a status light, confirm it turns on/changes
- If there are antennas, keep them attached and upright
Avoid these common traps:
- USB hubs/docks (unstable power/detection)
- Loose front USB ports on desktops (use a rear port first)
- “Wiggly” connectors (if touching it breaks WiFi, it’s physical)
If you’re also thinking “wifi extender not working,” do this first—an unstable client connection can look like an extender issue
(even a comfast wifi extender) when the extender is fine.
1.2. Try a Different USB Port or Restart
If it’s plugged in right but still dead, your next move is to force a clean re-detect.
Fast reset steps:
- Move the adapter to another USB port (prefer USB 3.0)
- Unplug → wait 10 seconds → plug back in
- Restart your computer
- Still offline? Restart your router/extender, then test again
Hotspot test (best time-saver):
- Works on hotspot but not home WiFi → likely router/extender settings
- Fails everywhere (including hotspot) → likely adapter/driver/system side (next chapters)
2. WiFi Adapter Not Showing Up at in Windows
This is the “my adapter is invisible” problem: you plug it in, but Windows acts like nothing happened.
No WiFi option, no new network adapter—sometimes not even a sound.
Good news: most of the time, it’s not dead hardware. It’s usually one of these:
- Windows can’t detect the device (USB/port/power issue)
- Windows detects it, but it’s hidden / disabled / labeled as unknown
Let’s figure out which one you have.

2.1. Check Device Manager for Hidden Issues
Your goal: confirm whether Windows can “see” the adapter.
Do this (Windows 10/11):
- Unplug the adapter
- Open Device Manager (right-click Start → Device Manager)
- Click View → Show hidden devices
- Expand Network adapters and Other devices
- Plug the adapter back in and watch what changes
What you’re looking for:
- If it appears under Network adapters (even greyed out) → Windows sees it

- If it appears as Unknown device under Other devices → Windows sees something, but the driver/device ID isn’t loading properly

- If nothing changes anywhere → treat it like a USB detection issue (go back to Chapter 1: switch port, avoid hubs, try another computer)
Quick fixes inside Device Manager:
- Click Action → Scan for hardware changes
- If you see Unknown device:
- Right-click → Uninstall device
- Unplug → restart PC → plug it in again (directly into a USB port, no hub)
Tip: If you’re also thinking “wifi extender not working” (including a comfast wifi extender), do this check first.
If your PC can’t see the adapter, it’ll feel like the extender is broken—even when it isn’t.
2.2. Enable the Adapter If It’s Disabled
Sometimes the adapter is detected, but Windows has it disabled, so it looks “missing.”
Enable it in 2 places (people often only do one):
A) Device Manager
- Device Manager → Network adapters
- If you see a down-arrow icon on the adapter:
- Right-click → Enable device
B) Network Connections
- Press Win + R → type ncpa.cpl → Enter
- Find anything named Wi-Fi / Wireless / 802.11 / USB WiFi
- If it’s greyed out: right-click → Enable
- If it’s acting weird: Disable → wait 5 seconds → Enable (fast reset)
Also check the “global off” switches:
- Airplane mode OFF
- Wi-Fi toggle ON
- Laptop hotkeys (some models can disable wireless at a hardware level)
If it still won’t show up after this, perfect—that’s the moment to move to Chapter 3,
because you’re now in driver/error-code territory, not guessing.
3. Fix Yellow Exclamation Mark on WiFi Adapter
If your adapter shows up but has a yellow exclamation mark in Device Manager, you’re not alone.
This is Windows basically saying: “I can see the device, but something about the driver isn’t working.”
Typical symptoms look like:
- WiFi option disappears or won’t turn on
- “Connected” but nothing loads
- Random drops right after you “fixed it”
- The adapter name shows, but it won’t scan networks
The good news: driver issues are usually fixable in minutes if you do it in the right order.
Quick read in Device Manager (common error codes):
- Code 28 usually means the driver is missing or not installed correctly.
- Code 10 often means the device can’t start, typically a driver or compatibility issue.
- Code 43 means Windows stopped the device because it reported a problem (driver, USB stability, or hardware).
You don’t need to memorize these. They just help you pick the right fix faster below.

3.1. Update or Reinstall Drivers the Easy Way
Goal: get Windows to load a clean, correct driver (not a half-broken one).
Fast method (recommended):
- Open Device Manager → Network adapters
- Right-click your WiFi adapter → Uninstall device
- Check “Delete the driver software for this device” (if you see it)
- Unplug the adapter
- Restart your PC
- Plug the adapter back in directly (no hub)
- Wait 30–60 seconds. Windows may reinstall a working driver automatically
If it still has the yellow mark:
- Device Manager → right-click adapter → Update driver
- Choose Search automatically for drivers
- After it finishes, restart once (yes, even if Windows says you don’t need to)
One common trap:
Windows sometimes grabs a “close enough” driver that works badly (slow speed, disconnects, no 5GHz).
If things feel unstable after an update, don’t keep tweaking WiFi settings. Fix the driver state first.
3.2. Roll Back If a Recent Update Broke It
If your WiFi died right after a Windows update or driver update, rolling back is often the fastest win.
Roll back the driver (best first try):
- Device Manager → right-click the adapter → Properties
- Go to the Driver tab
- Click Roll Back Driver (if available)
- Restart your PC and test again
If Roll Back is greyed out:
- Device Manager → Uninstall device
- Check Delete the driver software (if shown)
- Restart → plug it back in → let Windows reinstall
- Then re-test using your phone hotspot (quick isolation)
If you keep getting broken drivers after updates:
- Pause updates temporarily while you stabilize the connection
- Avoid “driver booster” tools. They often create more problems than they solve
If you’re using a USB adapter and you’re tired of driver roulette, that’s usually the point where a more modern, stable adapter becomes the clean solution.
We’ll talk upgrades later, including COMFAST.
4. WiFi Keeps Disconnecting or Dropping
This is the most annoying version of “WiFi adapter not working” because it kind of works—until it doesn’t.
You’ll see signs like:
- WiFi drops for a few seconds every 5–30 minutes
- Video calls freeze, games spike in ping, downloads restart
- It reconnects by itself, so you can’t “catch” the problem
Most of the time, disconnects come from power saving or interference. Fix those first before you blame the router
or say the wifi extender not working.

4.1. Turn Off Power Saving for the Adapter
Windows loves saving power. Your WiFi adapter usually hates it.
Do this (Windows 10/11):
- Open Device Manager → Network adapters
- Right-click your WiFi adapter → Properties
- Go to Power Management
- Uncheck: “Allow the computer to turn off this device to save power”
- Click OK → restart your PC
Also do this (helps laptops a lot):
- Open Control Panel → Power Options
- Your plan → Change plan settings → Change advanced power settings
- Expand Wireless Adapter Settings → Power Saving Mode
- Set it to Maximum Performance (both battery + plugged in, if possible)
If your drops mostly happen when you’re on battery, this fix alone often “magically” solves it.
4.2. Fix Interference or Channel Problems
If power isn’t the issue, you’re probably fighting RF noise, bad placement, or a crowded channel.
Quick wins you can do right now:
- If you’re on 2.4GHz, try 5GHz (faster, less crowded in many places)
- Move the adapter away from USB 3.0 devices/cables (USB 3.0 can create interference near 2.4GHz)
- Reposition the adapter:
- Use a short USB extension cable to move it out from behind a metal PC case
- Keep antennas upright (if your adapter has them)
- Restart the router/extender once, then test for 10 minutes
If you manage the router settings (optional but powerful):
- Lock 2.4GHz to channels 1 / 6 / 11 (don’t use “random” channels)
- Avoid overly aggressive band steering if devices keep bouncing between bands
- If your wifi extender not working, check placement: an extender placed in a weak-signal corner will repeat weak WiFi
If disconnects still happen after these fixes, your adapter may simply be struggling with a noisy environment or modern WiFi demands—later we’ll cover when upgrading
(like a newer COMFAST adapter) is the smarter, more stable move.
5. WiFi Adapter Cannot Find Any Network
If your WiFi list is empty (“No networks found”), or you can see networks but can’t connect, you’re usually dealing with a Windows WiFi service glitch,
a stuck network stack, or a bad saved profile—not “dead WiFi.”
Do these two fixes first. They solve a lot of cases without touching drivers.

5.1. Restart WLAN AutoConfig Service
WLAN AutoConfig is the Windows service that handles WiFi scanning and connecting. When it hangs, your adapter may look fine—but it won’t find any networks.
Restart it (Windows 10/11):
- Press Win + R → type services.msc → Enter
- Find WLAN AutoConfig
- Right-click → Restart
- If it’s not running: click Start
- Double-click it → set Startup type to Automatic
- Wait 15 seconds, then check your WiFi list again
If your WiFi list is still empty:
- Toggle WiFi OFF/ON in Windows quick settings
- Unplug/replug the adapter once (direct USB port, no hub)
- Restart the PC (yes, again—this combo is surprisingly effective)
5.2. Run the Built-in Network Troubleshooter
This isn’t magic, but it’s good at fixing common misconfigurations (resetting adapters, clearing stuck states, re-binding protocols).
Run it:
- Settings → Network & Internet
- Go to Advanced network settings (or “Status” on older builds)
- Choose Network troubleshooter (or “Additional troubleshooters”)
- Pick Internet Connections and/or Network Adapter
- Apply any fixes it recommends, then restart once
Two extra fixes if you still can’t connect:
- Forget and rejoin the WiFi network
- Settings → WiFi → Manage known networks → Forget → reconnect and re-enter the password
- Try a phone hotspot
- If hotspot works but home WiFi doesn’t, your router/extender settings are likely the issue
(this is where “wifi extender not working” can be misleading)
- If hotspot works but home WiFi doesn’t, your router/extender settings are likely the issue
If your WiFi list comes back but you’re getting drops or slow speeds, that’s a different problem—and we’ll tackle it next.
6. WiFi Is Connected but Speed Is Very Slow
This one feels unfair: you’re connected, the WiFi icon looks normal… but everything is slow, buffering, or “weak signal” shows up even when you’re not that far away.
In most cases, the problem is placement (your adapter is in a bad spot) or capability (older hardware can’t keep up with modern WiFi).
Fix placement first—it’s the cheapest upgrade.

6.1. Check Antenna Placement and USB Extension
A USB WiFi adapter sitting behind a PC tower is basically hiding behind a metal shield. Same idea if it’s buried in cables or pressed against a wall.
Do these quick improvements:
- Use a short USB extension cable (even 0.5–1m helps)
- Move the adapter onto the desk, away from the PC case
- Keep antennas upright (if your adapter has them)
- Pointing them sideways or folding them down often hurts reception
- Avoid “noise zones”
- Don’t place it right next to USB 3.0 hard drives, monitors, or thick cable bundles
- Test 5GHz vs 2.4GHz
- 2.4GHz reaches farther but is crowded
- 5GHz is faster but drops faster through walls
- If 5GHz is weak where you sit, switch to 2.4GHz for stability
If you use an extender: slow speed can also come from extender placement. An extender repeating a weak signal will still feel weak—this is why “wifi extender not working”
sometimes is really “extender placed too far.”
6.2. Why Old Adapters Struggle with Modern WiFi
If your adapter is older (or very basic), it may connect fine but still perform badly—especially in busy environments.
Common limitations of older adapters:
- Stuck on 2.4GHz only (more interference, lower real-world throughput)
- Lower channel widths and older modulation (slower even with strong signal)
- Weaker sensitivity and smaller antennas (drops sooner through walls)
- More driver quirks on newer Windows versions
How to tell it’s a capability problem (not just signal):
- Your phone gets fast WiFi in the same spot, but your PC is slow
- Moving the adapter closer barely helps
- Speed is “capped” at a low number no matter what you try
- You’re on a modern router, but the adapter can’t take advantage of it
At that point, you can keep tweaking… or you can upgrade to a modern adapter that matches today’s WiFi.
Later we’ll cover why a newer COMFAST option can be a clean fix when your current adapter is simply the bottleneck.
7. WiFi Adapter Stopped Working After Windows Update
If your WiFi broke right after a Windows update, you’re not imagining it. Updates can replace drivers, reset network components, or change security and adapter behavior, so a previously stable setup suddenly looks like “WiFi adapter not working.”
Your goal is simple: undo the recent change, then reset the network stack if needed.
Follow the official troubleshooting mindset:
- Confirm the adapter is enabled and detected in Device Manager
- Restart wireless services if scanning or connecting is stuck
- Use Network reset when Windows networking is in a corrupted or “half working” state
This chapter applies the same logic in a clean order, so you do not bounce between random settings.

7.1. Uninstall Recent Updates Temporarily
Start with the easiest “undo” first.
Uninstall the latest Windows update:
- Settings → Windows Update
- Update history → Uninstall updates
- Sort by date and remove the most recent update
- Restart and test WiFi again
If your adapter driver changed (common):
- Device Manager → Network adapters
- Right-click your adapter → Properties → Driver tab
- Try Roll Back Driver (if available)
- Restart and test again
Tip: If WiFi comes back after uninstalling, pause updates for a short time so Windows doesn’t immediately re-break it while you stabilize everything.
Before you roll back anything, confirm it is truly update related:
- Hotspot test: if it works on a phone hotspot but not on home WiFi, the update may have changed router compatibility, security mode, or saved profiles
- If it fails everywhere after the update, focus on driver state and Windows networking components
7.2. Reset Network Settings Completely
If uninstalling doesn’t help, or WiFi is still glitchy, do a full network reset. This clears a lot of stuck adapter states and corrupted settings.
Network Reset (Windows 10/11):
- Settings → Network & Internet
- Advanced network settings
- Network reset → Reset now
- Restart when prompted
After the reset, you MUST do these:
- Reconnect to your WiFi (you’ll need the password again)
- Re-check VPN and proxy apps (they can block internet after resets)
- If you use an extender, reconnect to the correct SSID (people often reconnect to the wrong band or an old saved name)
Optional but useful for support teams:
After a Network reset, keep notes on what changed. For example, which update date triggered the issue, which driver version worked, and whether hotspot works. This short log saves time if customers report the same problem again.
Quick reality check: If WiFi works on your phone but your PC still fails after a reset, it’s likely driver or adapter side.
That’s when upgrading to a more modern, stable USB adapter starts to make sense, especially if you’re tired of Windows update surprises.
8. When It Is Time to Replace Your WiFi Adapter
If you’ve done the basics (ports, restarts, services, driver cleanup) and you’re still dealing with random drops, weak signal, or “works today, breaks tomorrow,”
you might not have a settings problem anymore. You might have a hardware capability and stability problem.
Upgrading is not about chasing bigger numbers. It is about getting a cleaner, more predictable connection that stops wasting your time.

8.1. Why a Modern WiFi Adapter Solves Many Stability Issues
A lot of adapter headaches come from three root causes: old WiFi standards, weak reception, and driver chaos after updates.
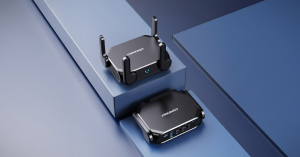
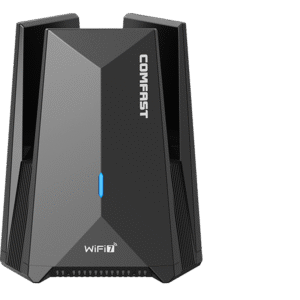
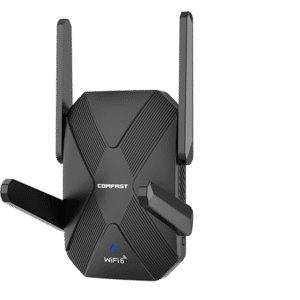
CF-972AX is designed to reduce those pain points in a practical way.
What it improves in real-life terms:
- More usable bandwidth in busy areas
It supports WiFi 6 and tri-band operation, so you have more practical options when 2.4GHz is crowded. - Stronger, steadier reception
Dual external antennas help with positioning and signal capture. This directly helps the “weak signal even when connected” problem. - Fewer setup headaches on modern Windows
It is designed for a simplified setup experience on Windows 10 and Windows 11. Depending on the system environment, it may install automatically without manual driver hunting. - More stable USB link
USB 3.0 support helps avoid the bottlenecks and inconsistent behavior you sometimes see with older USB setups. - More secure connections
WPA3 support helps on networks that require newer security modes where older adapters may fail to authenticate.
Important note about 6GHz:
6GHz connectivity requires a WiFi 6E capable router or access point, and 6GHz availability depends on local regulations. If your router does not support 6GHz, you can still use 5GHz or 2.4GHz normally.
If you want the official product page for reference, here it is:
COMFAST CF-972AX AX5400
8.2. How to Set Up a New USB WiFi Adapter Quickly
You want a setup that is boring. That is a compliment.
Fast setup steps (Windows 10/11):
- Plug CF-972AX into a direct USB 3.0 port if you have one (avoid hubs at first).
- Wait for the system to complete installation (automatic install behavior may vary by environment).
- Open the WiFi list and connect to your network. Use 5GHz or 6GHz when you are close to the router. Use 2.4GHz when you are farther away.
- Position the adapter for signal quality. Keep antennas upright. Use a short USB extension if needed to move it away from the back of a metal PC case.
- Do a quick stability test. Run a 5 minute video call or stream plus a speed test. Look for consistency, not just peak speed.
Two practical next steps:
- For end users: view specs and compatibility on the product page: COMFAST CF-972AX AX5400
- For resellers and OEM partners: if you need bulk supply, branding, packaging, or spec alignment for your market, contact COMFAST for an OEM or ODM plan.
B2B and OEM inquiry:
For distribution, project deployment, or OEM and ODM cooperation, contact us at zy@comfast.cn.
Summary of Key Fixes
If you just want the “get me back online” checklist, here are the 8 main problems and the fastest fix that usually works (plus 2 bonus fixes at the end).
The 8 main problems (fastest fix):
- Adapter plugged in loosely → Unplug → plug in firmly (no wobble).
- Bad USB port / hub issue → Switch ports (prefer USB 3.0) and avoid hubs/docks.
- Adapter not showing up at all → Device Manager → View → Show hidden devices → Action → Scan for hardware changes.
- Adapter is disabled → Enable it in Device Manager and ncpa.cpl (Network Connections).
- Yellow exclamation mark → Uninstall device (delete driver if offered) → restart → replug.
- No networks found → Restart WLAN AutoConfig (services.msc) → toggle WiFi → reboot.
- Keeps disconnecting → Turn off adapter power saving (Device Manager → Power Management) + set Wireless Power Saving to Maximum Performance.
- Slow speed / weak signal → Use a short USB extension, move it away from the PC case, keep antennas upright, try 5GHz vs 2.4GHz.
Bonus fixes (when the basics aren’t enough):
- Can’t connect to a network → “Forget” the WiFi → rejoin → test with a phone hotspot.
- Broke after a Windows update → Uninstall recent update / roll back driver → if still broken, do a Network reset.
One mindset that saves hours: run the hotspot test.
- Works on hotspot but not home WiFi → likely router/extender settings (this is where “wifi extender not working” can be misleading).
- Fails everywhere → adapter/driver/system side.
And if you’ve done all the fixes and it’s still unstable, don’t keep suffering—upgrading to a modern adapter like
COMFAST CF-972AX (plug and play, USB 3.0, WPA3) is often the cleanest way to stop repeat issues.
Frequently Asked Questions
Quick answers to the most common WiFi adapter questions—so you can fix the issue without guesswork.